How to Vent a Resin 3D Printer to the Outside
If you're searching for how to vent a resin 3D printer outside, you already understand the core problem: the built-in carbon filter isn't enough. Here's a practical guide to setting up direct exhaust ventilation — what you need, how it works, and what to watch out for.
Why Outside Ventilation Matters
Resin printing releases volatile organic compounds (VOCs) throughout the entire workflow — during printing, when you open the lid, during IPA washing, during UV curing, and even from finished parts for weeks afterward. Built-in carbon filters on consumer printers reduce odor, but they recirculate the filtered air back into the room. The VOCs don't leave.
Direct exhaust ventilation solves this by pulling contaminated air from inside the printer and physically moving it outside, similar to how a bathroom exhaust fan or a portable air conditioner window kit works. Fresh air replaces it through a cracked window or other intake.
This is the method NIOSH recommends at the top of its control hierarchy for vat photopolymerization printers. It removes the contamination at the source.
How the System Works
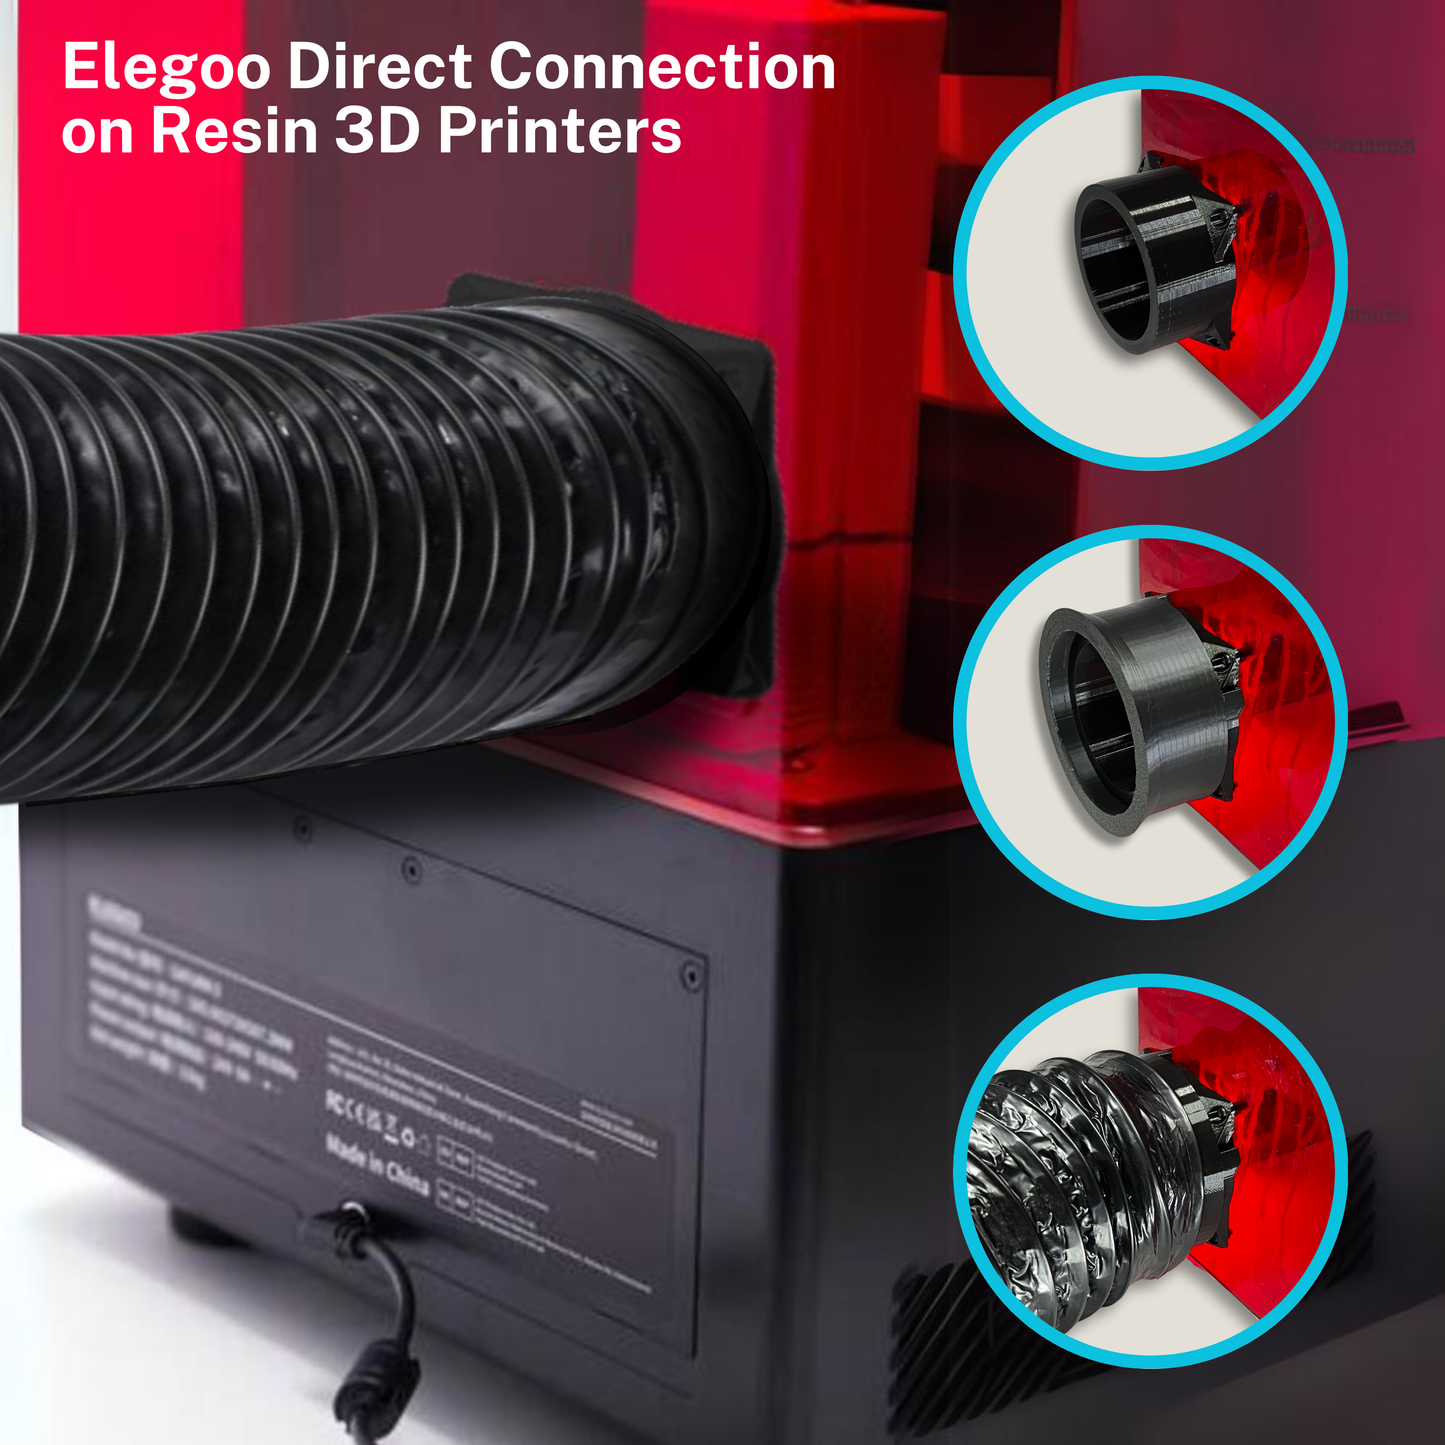
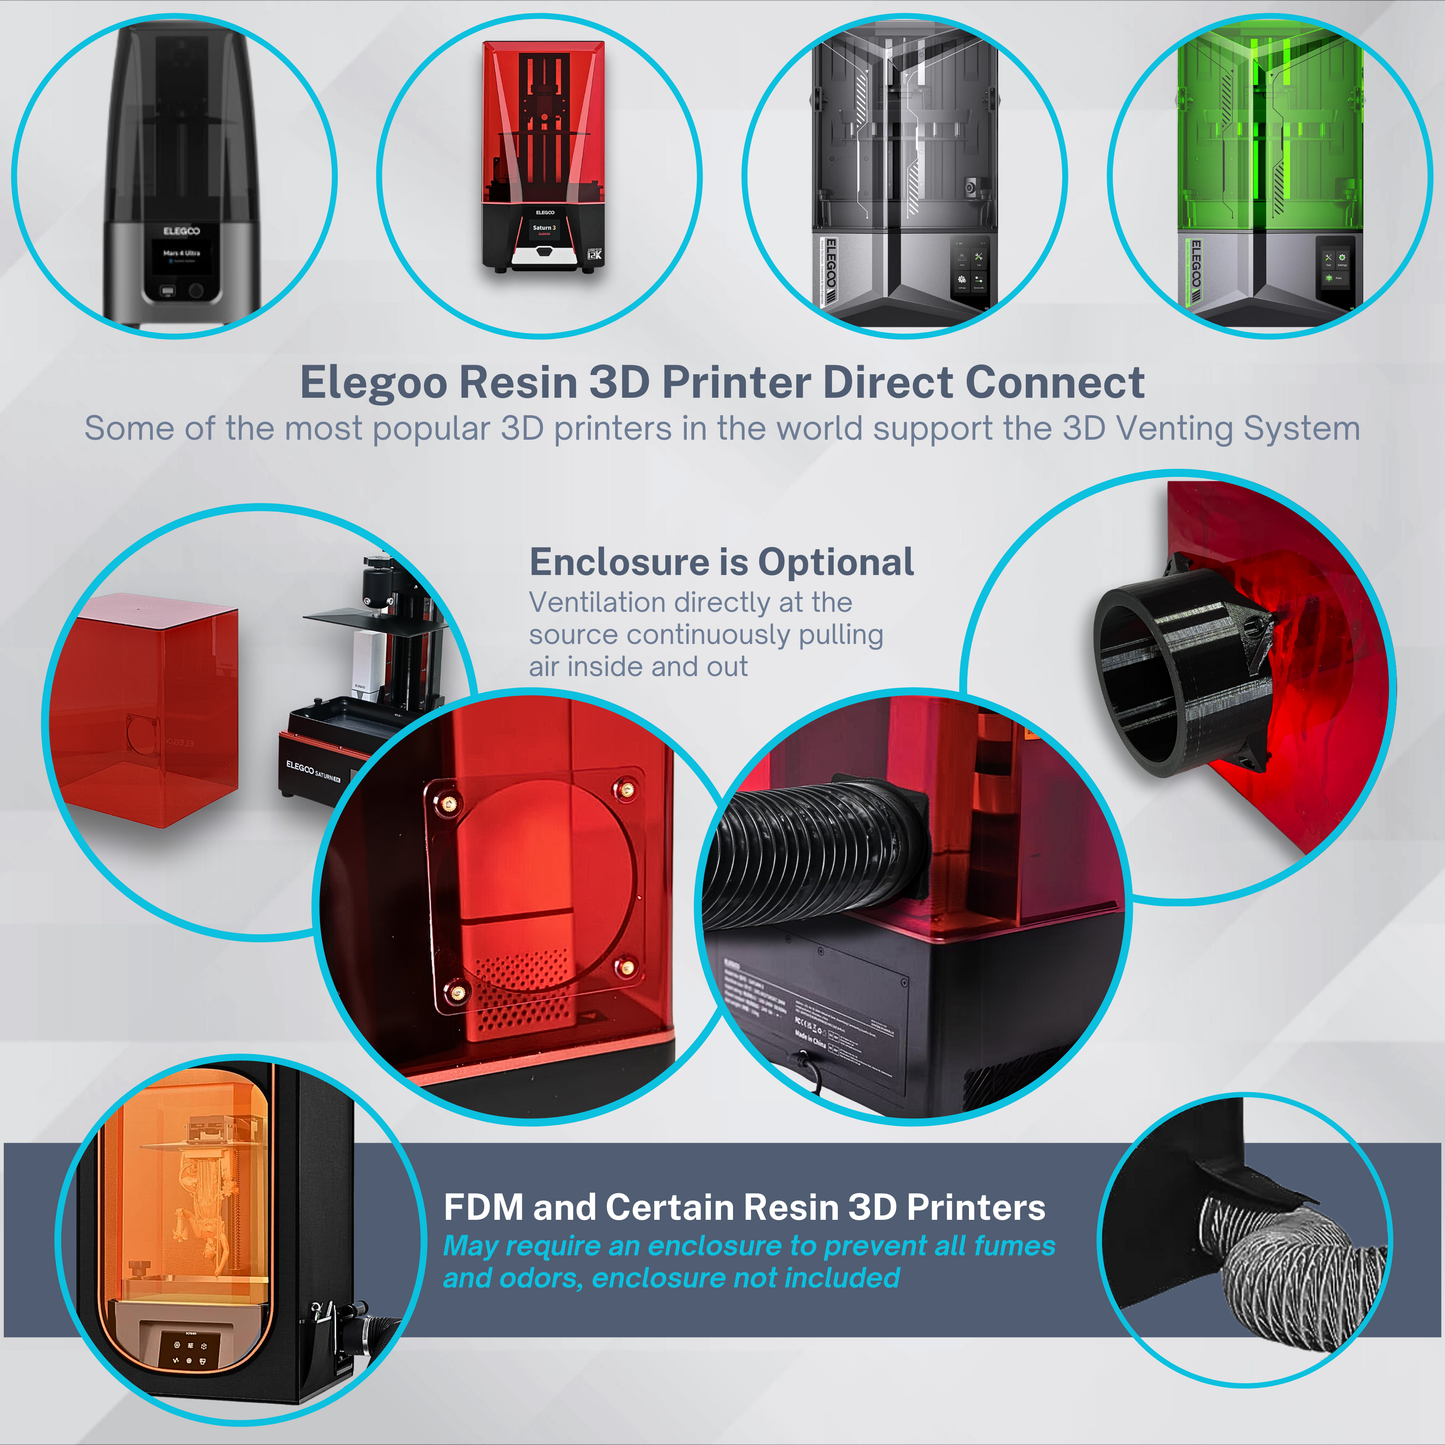
Most ELEGOO resin printers have a dedicated exhaust port on the back panel — the same connection point the built-in carbon filter uses. Remove the carbon filter connection, replace it with an adapter that connects to an inline fan, route a flexible duct hose from the fan to a window vent or exterior outlet, and let the fan do the work.
When the fan runs, it creates negative pressure inside the printer, drawing contaminated air out and through the duct to the outside. The printer body acts as the intake, pulling fresh air in around the lid and other seams.
What You Need
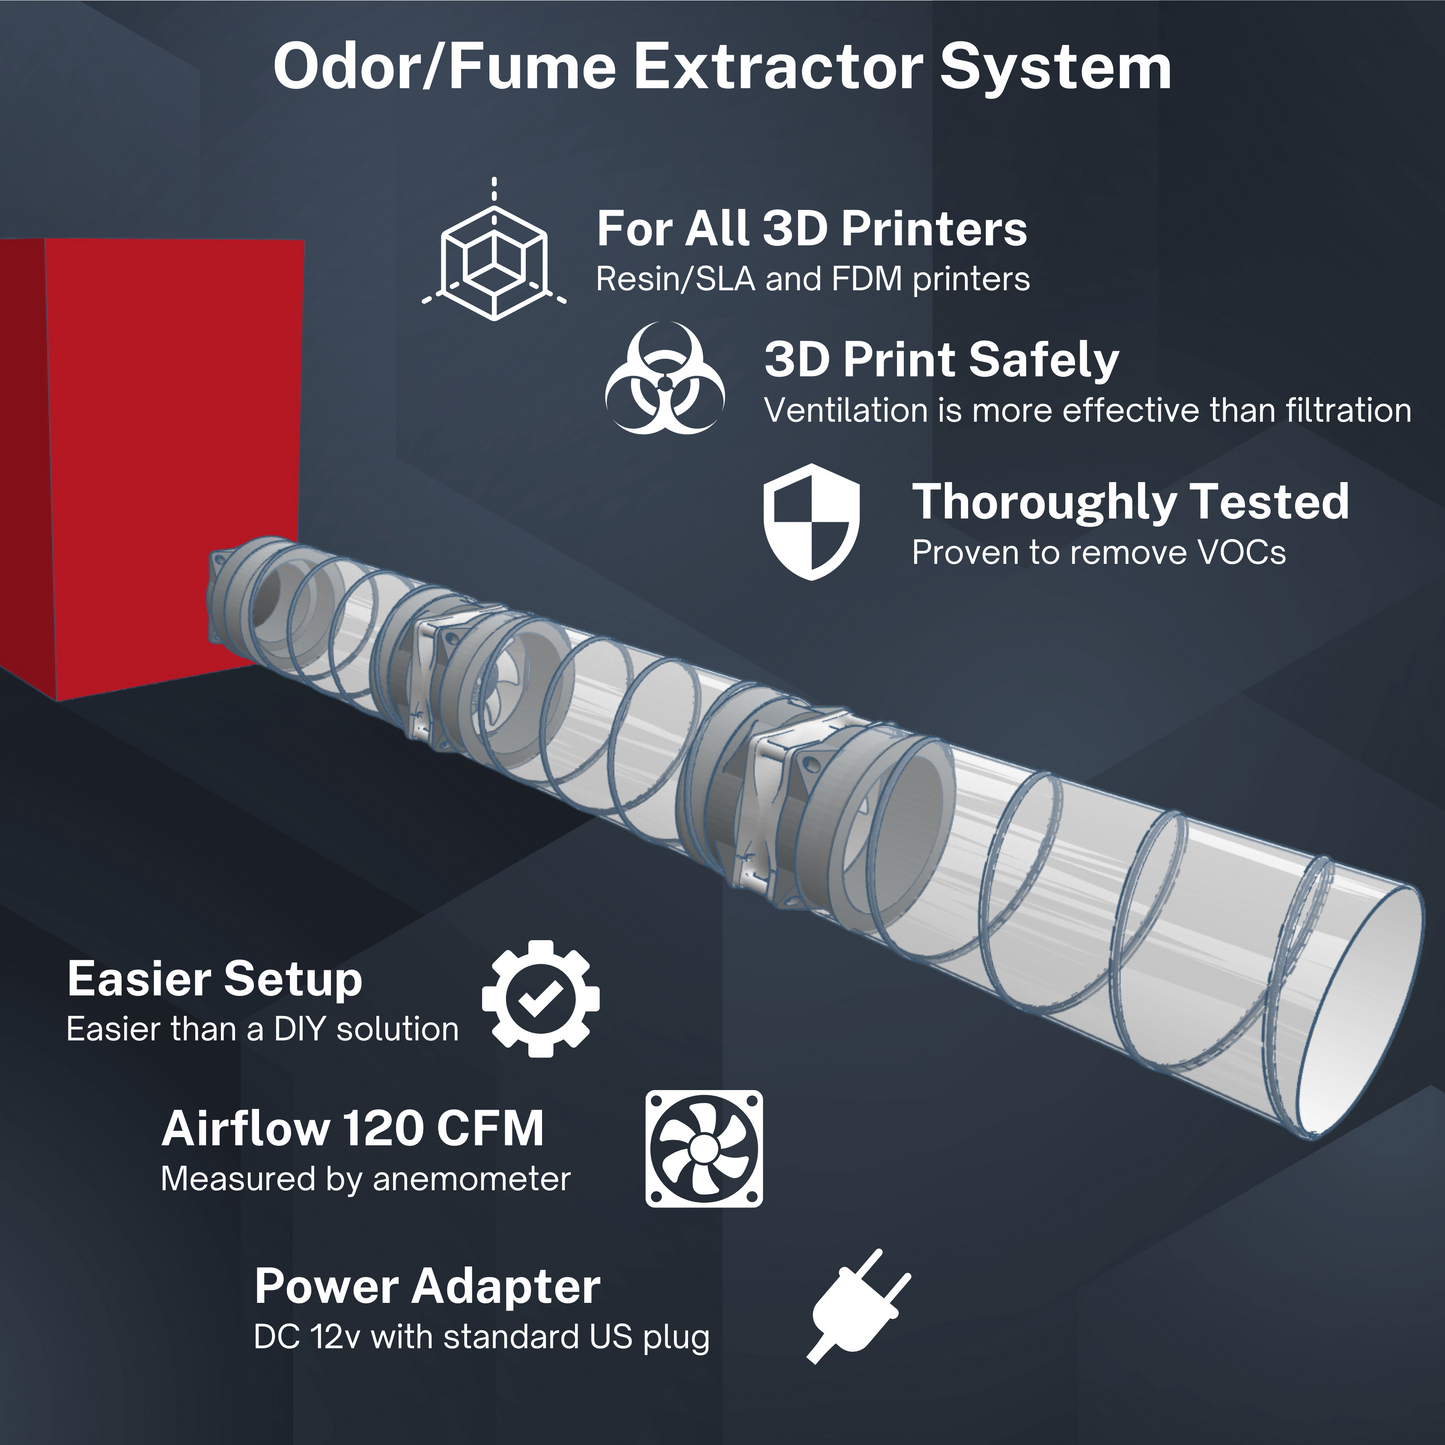
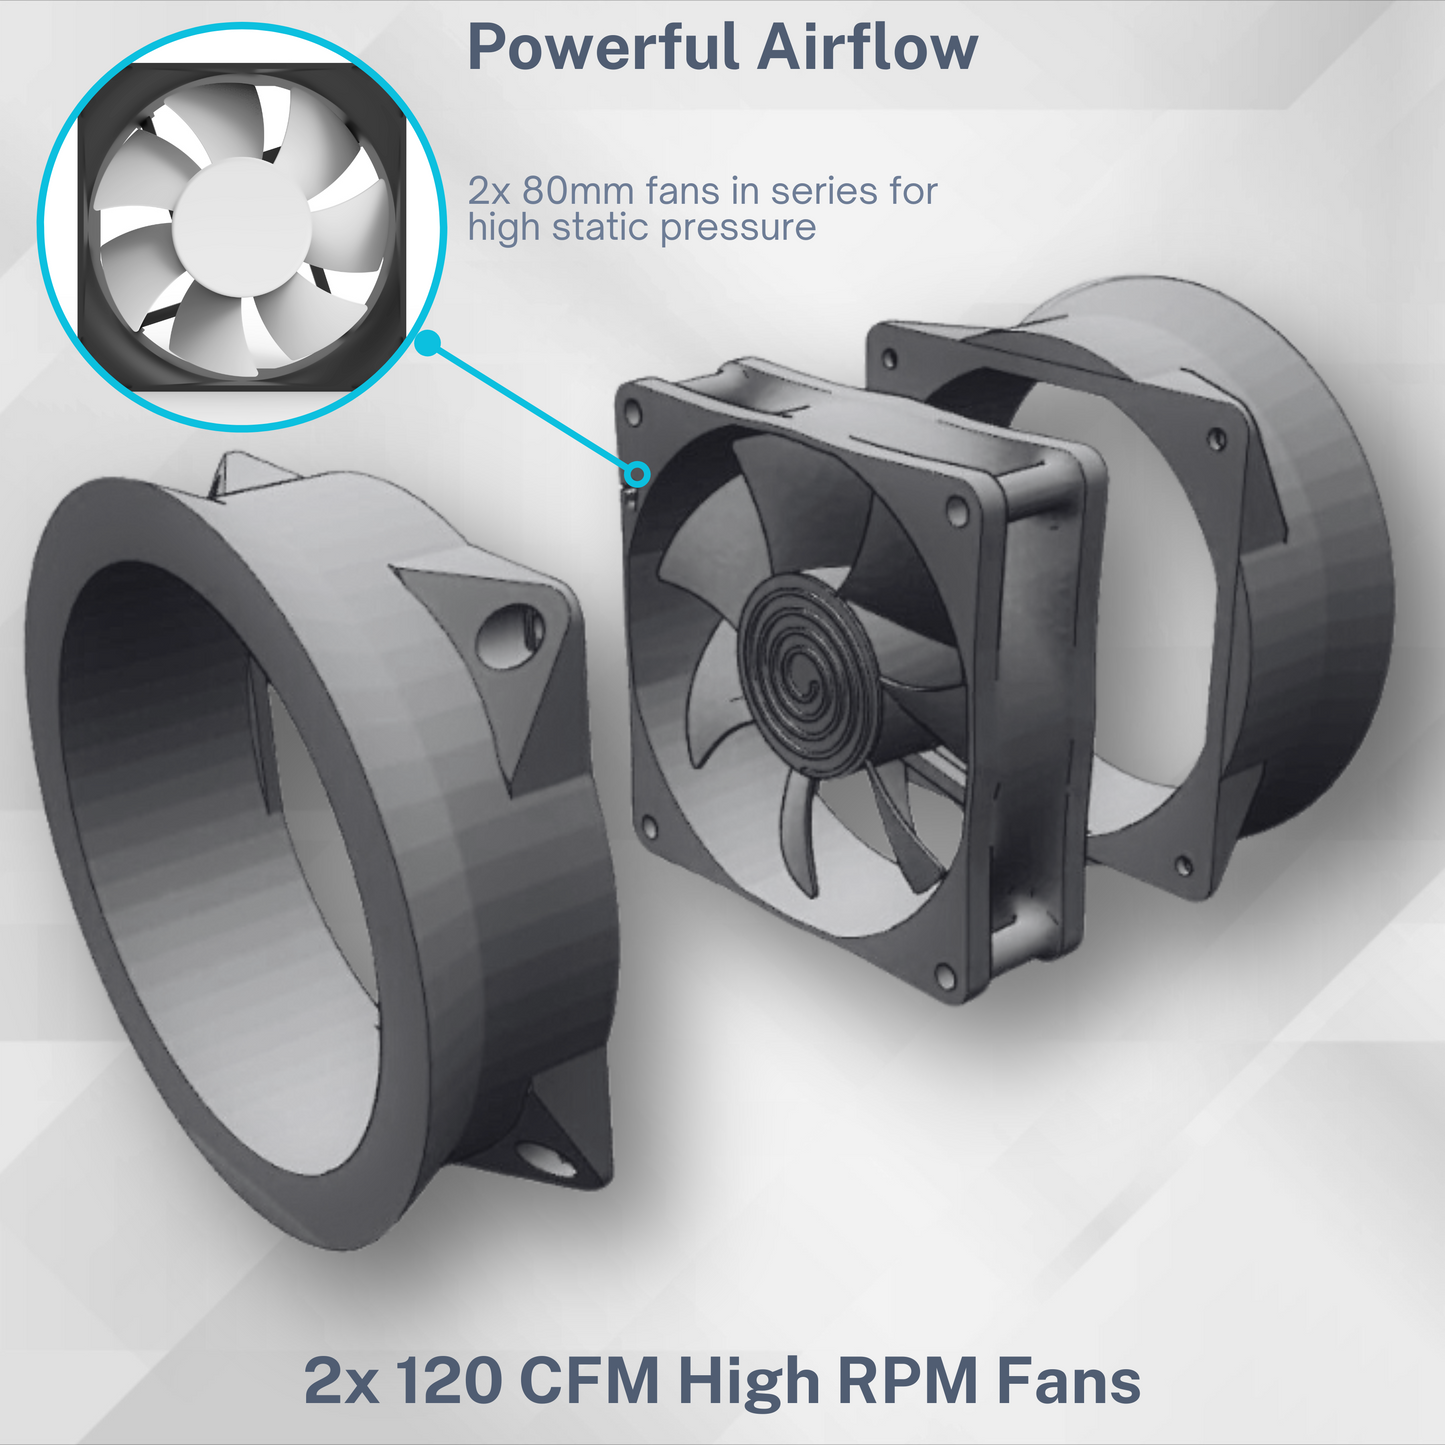
Fan: An inline duct fan in 80mm or 120mm format. For single-printer setups, an 80mm fan moving 80–120 CFM is sufficient. For larger printers or more airflow headroom, a 120mm fan (200–250 CFM) is more effective.
Duct hose: Flexible aluminum duct hose in 3" diameter (for 80mm fan systems) or 4" diameter (for 120mm). Standard HVAC duct hose from any hardware store works. You'll want 6–10 feet to comfortably reach a window without sharp bends.
Adapters: Most inline fans aren't designed to connect directly to a printer exhaust port. 3D Venting makes exhaust port adapters for ELEGOO printers that connect the printer's exhaust port to standard duct hose sizes. The STL files for these are free on Cults3D.
Window vent: A pre-made window vent insert (the kind used for portable air conditioners) is the easiest solution. You can also cut a circle in a piece of foam board and use a dryer vent cover for a more permanent setup.
Speed controller (optional but recommended): Running the fan at lower speeds for long prints saves noise and is more than sufficient for airflow.
Compatible ELEGOO Printers
The following ELEGOO printers have a dedicated exhaust port that direct-connects to the duct system without requiring an enclosure:
- Mars 4 DLP, Mars 4 MAX
- Mars 5, Mars 5 Ultra
- Saturn 8K, Saturn 2, Saturn 3 Series
- Saturn 4 Series, Saturn 4 Ultra, Saturn 4 Ultra 16K
- Jupiter, Jupiter SE, Jupiter 2
DIY vs. Complete Kit
DIY approach: Print the free STL adapter files from Cults3D, source a fan and duct hose from Amazon or a hardware store, and assemble the system yourself. Total cost is roughly $40–60 depending on fan quality.
Complete kit: The 3D Venting VENT80 ($79.95) and VENT120 ($99.95) include all the components: dual fans, 8 feet of duct hose, an exhaust port adapter, and a speed controller. Everything is designed specifically for ELEGOO printers and tested together. Ships from Charlottesville, VA with a 180-day guarantee.
The Fresh Air Problem
When you exhaust air out, you need air to come in. If your print room is sealed, the fan will work against itself — pressure builds and airflow drops. Leave a window cracked in the print room, or leave the door slightly open to a ventilated space.
Safety Practices That Still Apply
- Don't stay in the print room while printing
- Wait at least 24 hours before re-entering after the print ends — off-gassing continues even after the printer shuts off
- Wear nitrile gloves and a respirator during IPA washing and UV curing
- Run the fan during the entire print
If you want to try a DIY setup first, download the free adapter STL files from the 3D Venting Cults3D page. If you'd rather skip the build, the VENT80 and VENT120 kits are at 3dventing.com.